Getting started
Starting your first project
How to get your drawings into a structured list in just a few clicks.
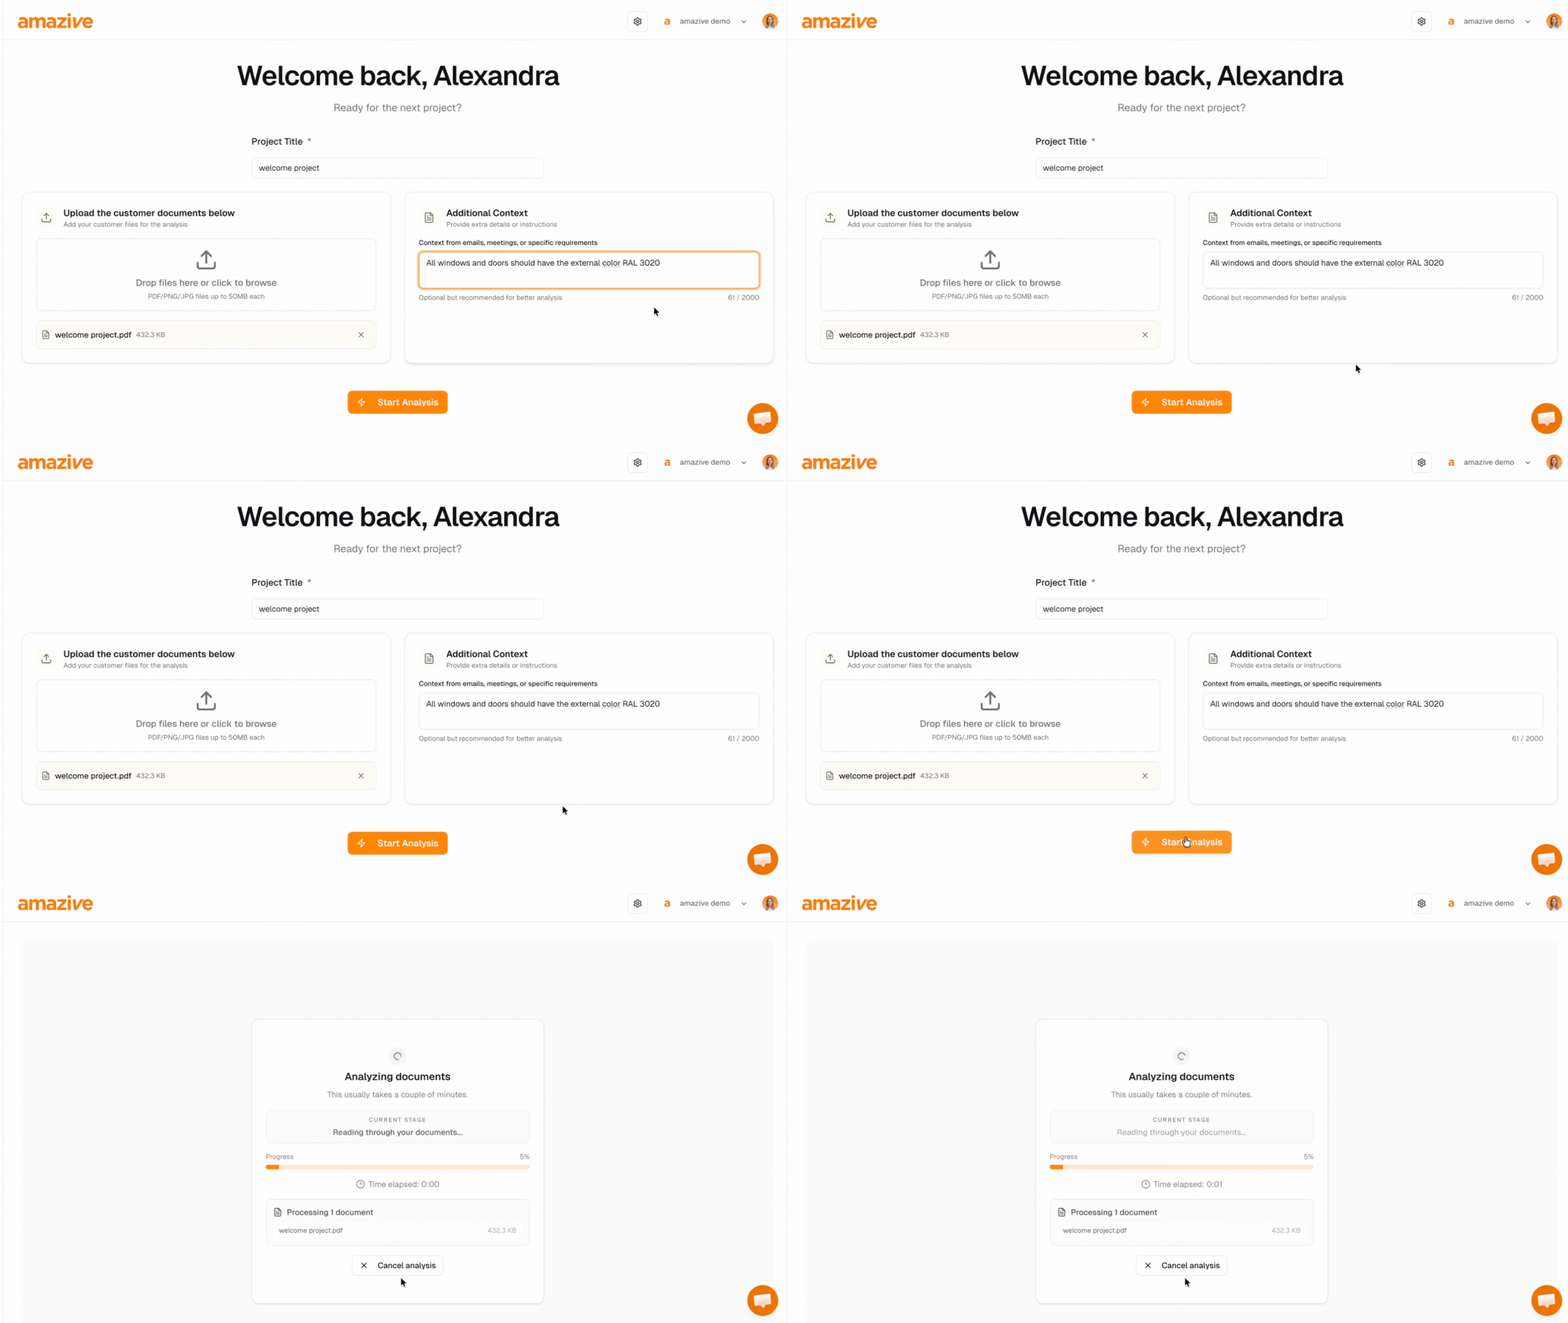
Starting a new job in amazive is designed to be fast and automatic. You provide the drawings and any extra notes you have, and the system handles the rest.
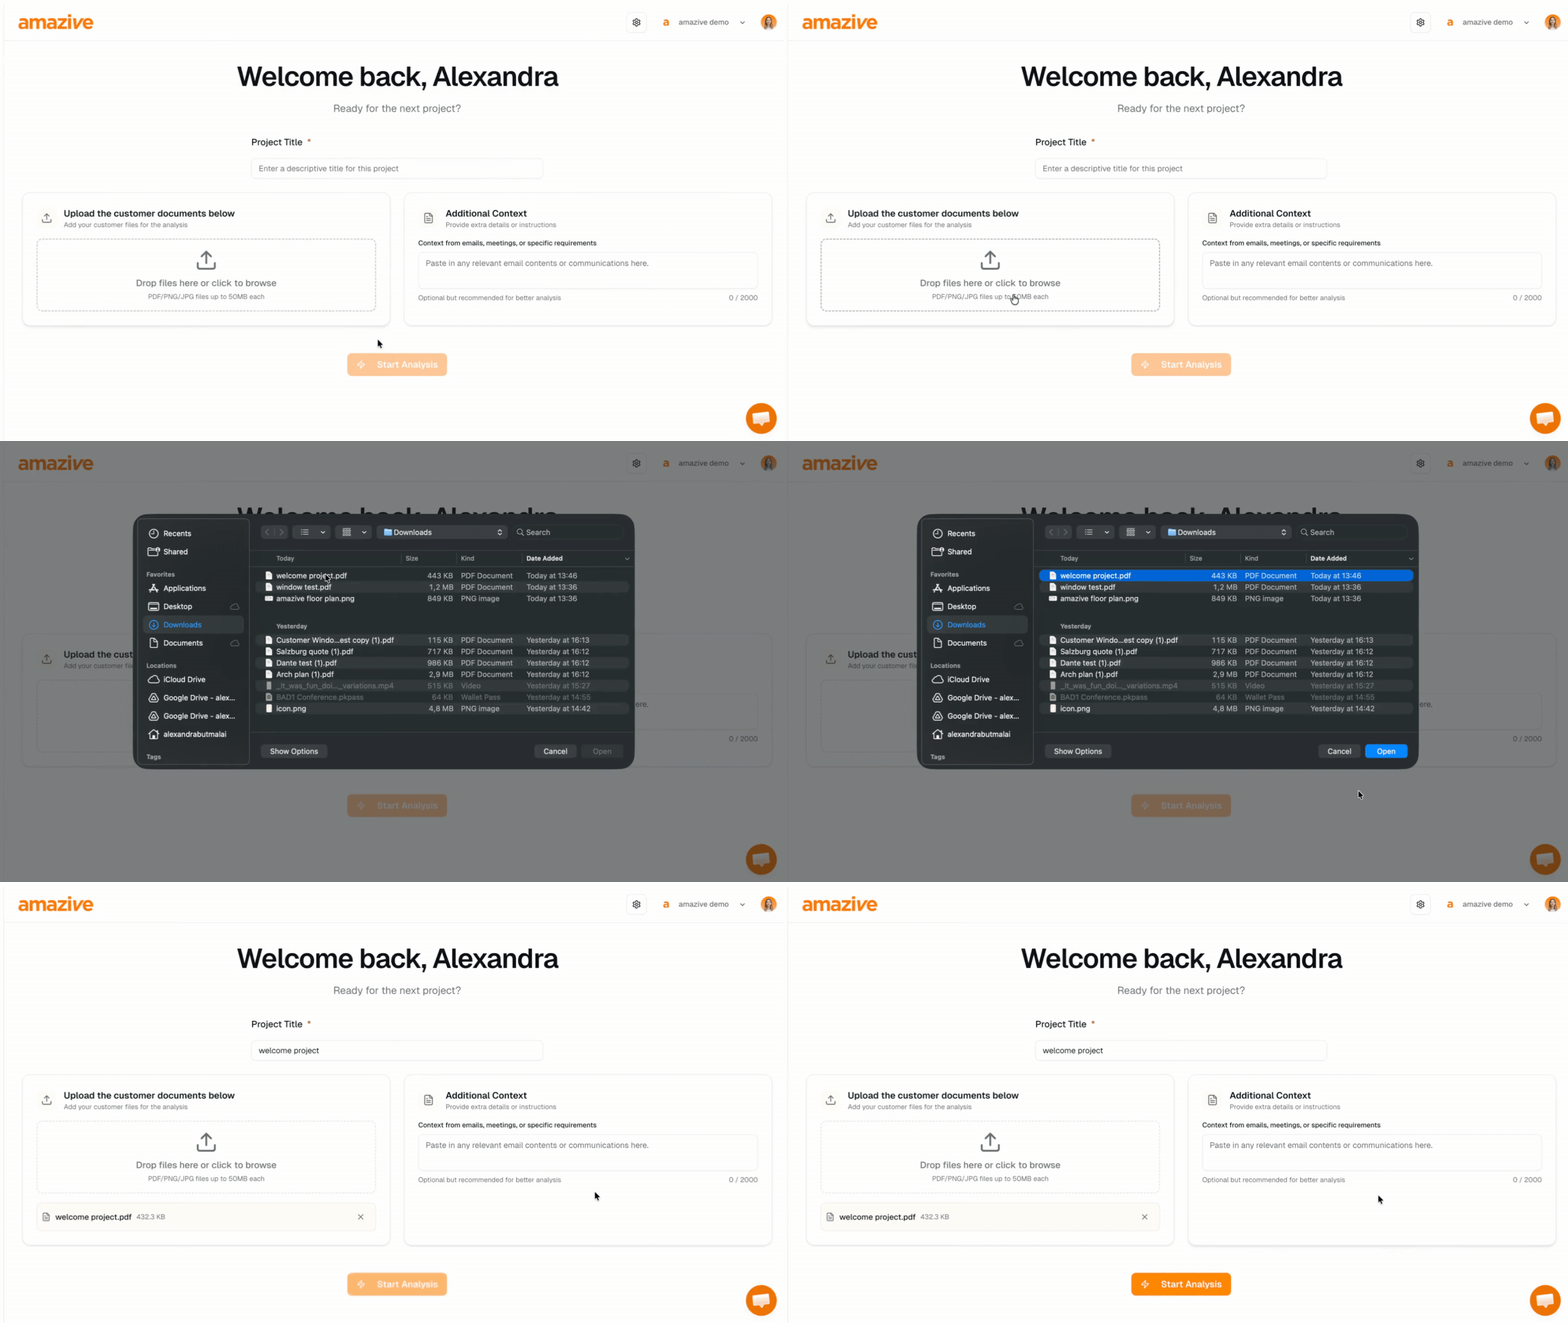
1.Upload your documents
The first step is to bring your files into amazive.
- How to upload: Drag your files into the Document Upload box or click to browse your folders.
- Multiple files: You can upload several files at once—for example, a floor plan and a schedule together.
- Automatic Naming: Once you upload a document, amazive will automatically suggest a Project Title based on the file name. If you want to change it (for example, to the customer's name), just click the title box and type your preferred name.
2.Add "additional context"
Sometimes, the most important details aren't on the drawing—they might be in an email or a note you took.
- What to add: Paste in any specific requirements, email snippets, or thoughts you have about this specific project. This helps the system "understand" the drawings much better.

3.Start the project
When you're ready, click the orange Start Project button.
- The Wait: It usually takes between 30 seconds and 3 minutes. For larger projects (like big apartment buildings), it may take a little longer.
- No need to refresh: Once the system is finished, your organized data table will automatically appear on your screen.